
Project · Power Supplies
Regulated Power Supply
Here is a very simple but effective regulated power supply project. Regulated power is clean and a good power supply for multiple pedals.
Project files
Everything you need to build it
Regulated Power Supply Ready-To-Solder Pinted Circuit Board For use only if you are a complete DIY person who wants to etch and drill your own PCB. Otherwise, we recommend you ignore this PCB mask and buy the Ready-to-Solder Printed Circuit Board.
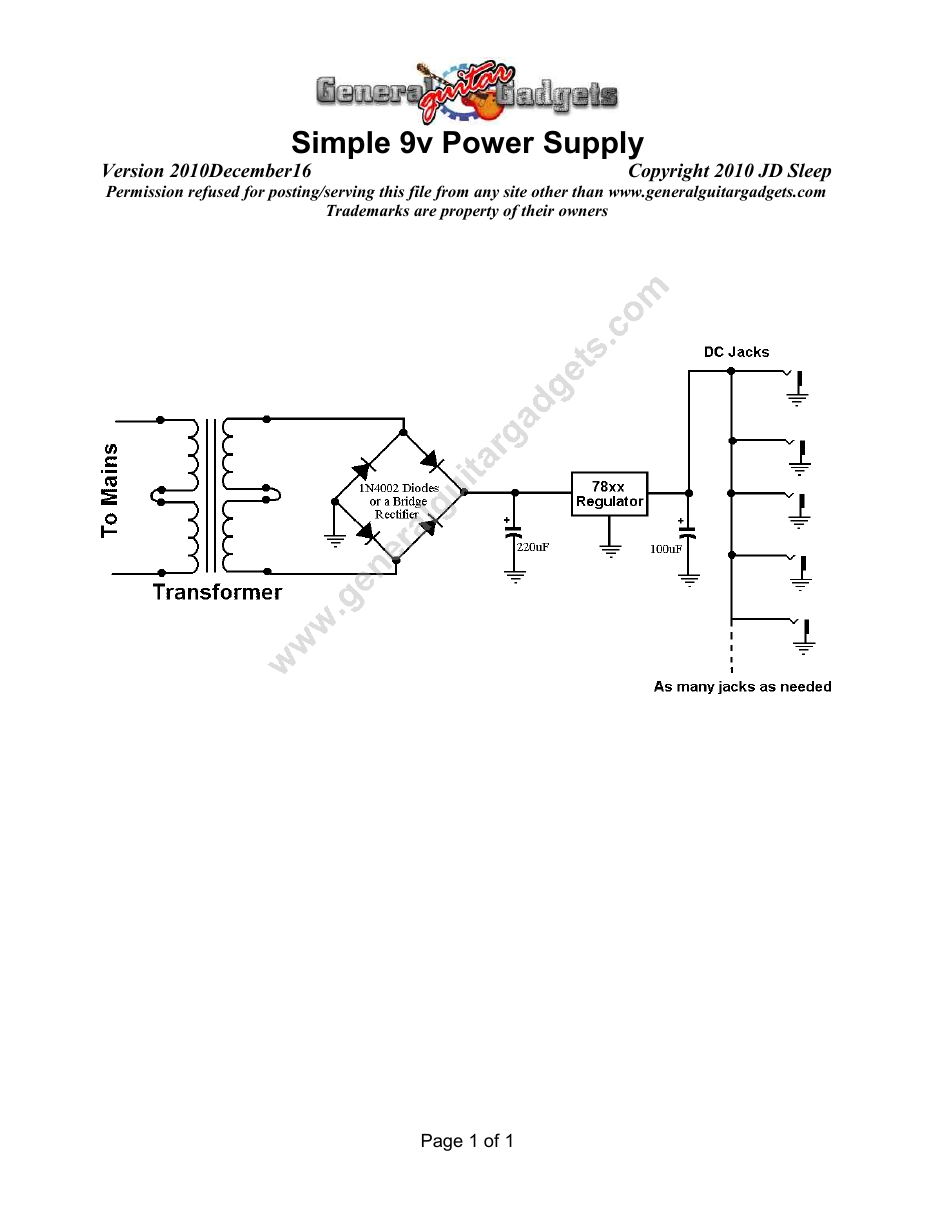
Parts layout
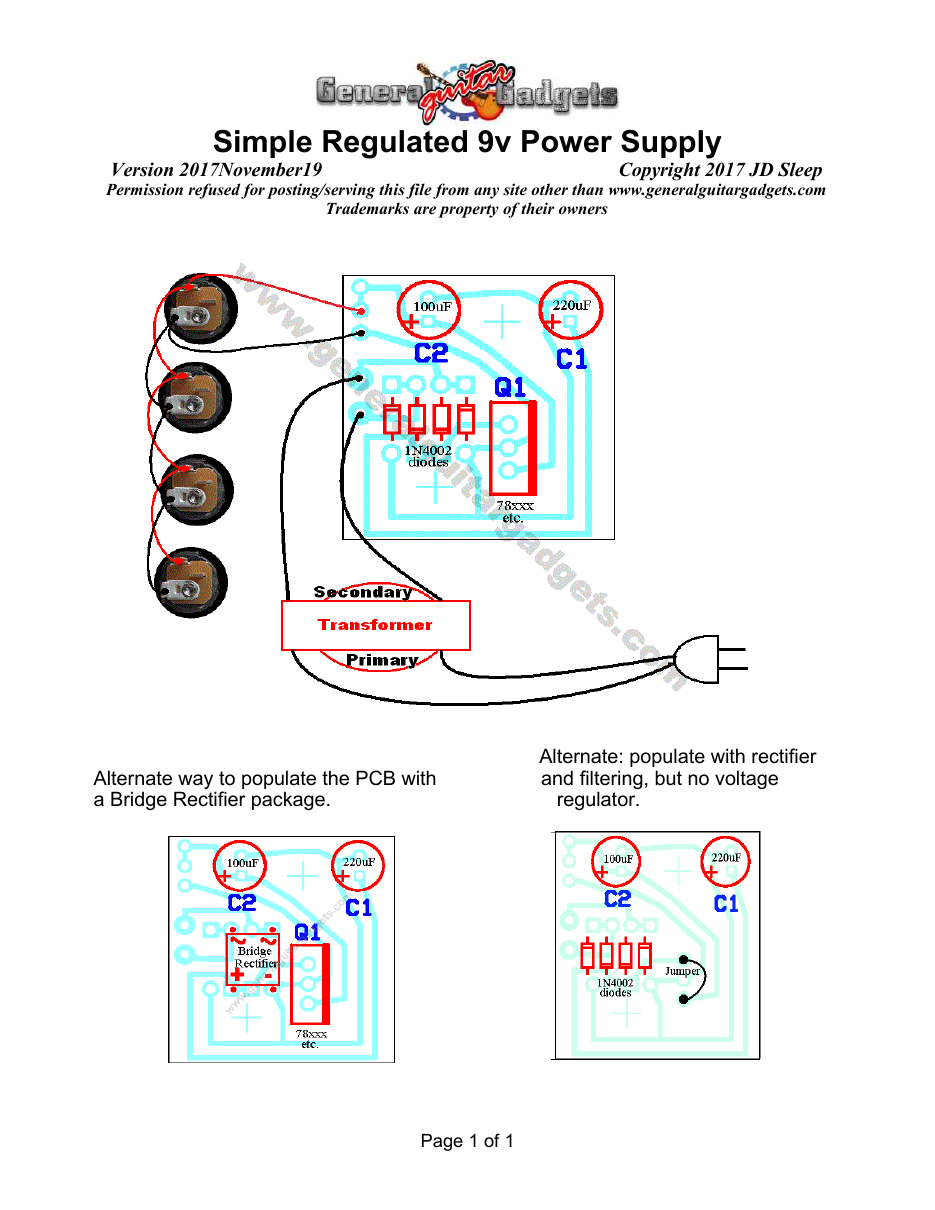
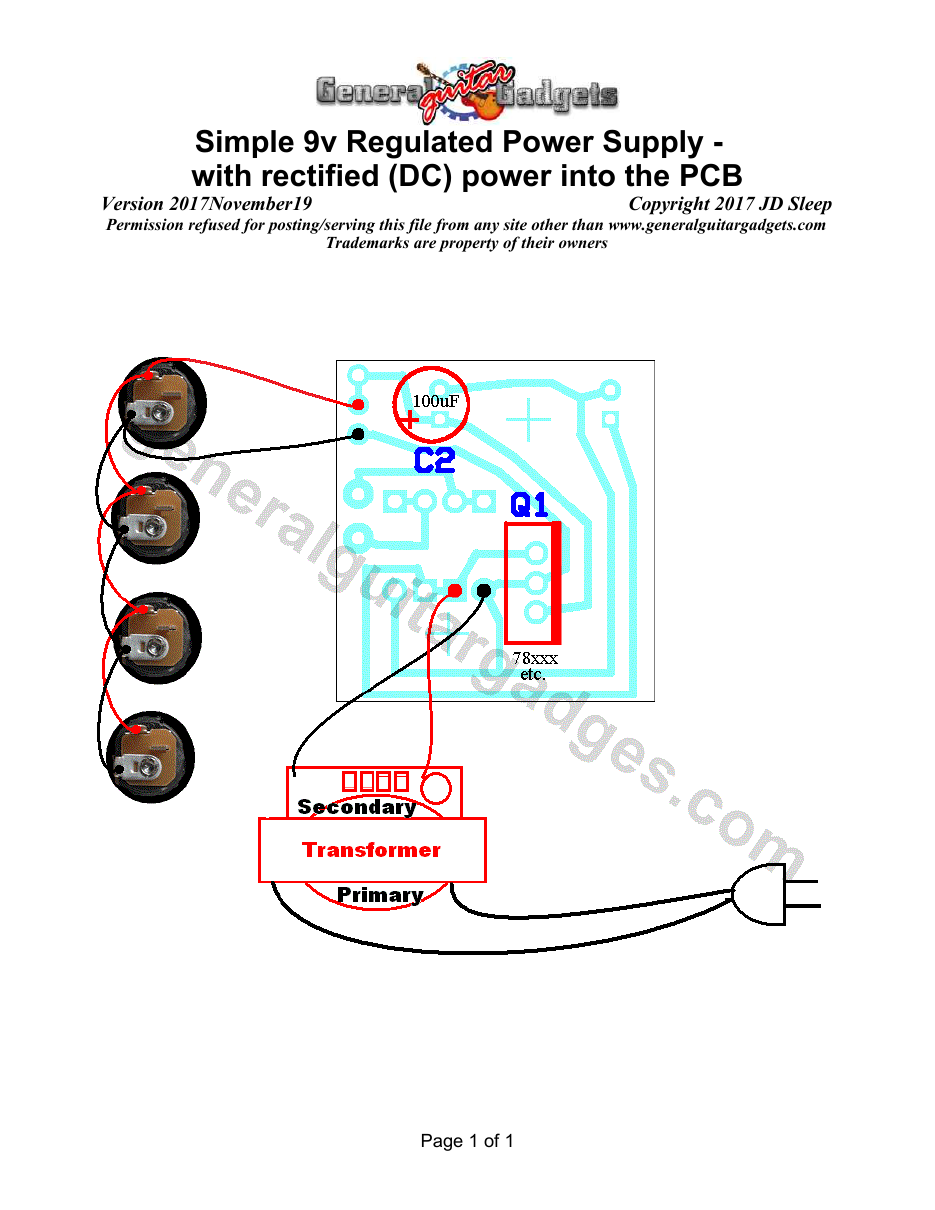
Parts Layout / Wiring Diagram
What you will need
Bill of Materials
Version 2010December16 · Copyright 2010 JD Sleep · Permission refused for posting/serving this file from any site other than www.generalguitargadgets.com · Trademarks are property of their owners
Resistors
None
Capacitors
| Capacitor ID | Value | Type | Possible Marking |
|---|---|---|---|
| C1 | 220µF | Aluminum Electrolytic | 220µF |
| C2 | 100µF | Aluminum Electrolytic | 100µF |
Other
| Part ID | Part Name |
|---|---|
| Q1 | 7809 |
| D1, D2, D3, D4 | 1N4001 or 1N400x (“x” being any number) 1N914 probably many other types of diodes could be used here. |
| J1 – Jx (“x” being any number) | DC Jacks Printed Circuit Board, 24 gauge stranded wire, Enclosure |
More about this project
Notes, sounds and related links
Caution: Do not attempt to build this project unless you are familiar with all safety rules relating to 120 volt ac electrical household current. Use extreme caution when wiring and building this project! Misuse may lead to DEATH or serious injury.
The layout leaves plenty of room for most types of heat sinks on the regulator.
Note: If you want to use a 3-prong plug (in USA grid), you must securely attach the 3rd wire (ground) to the metal enclosure of the power supply. This is just like you would do for an amplifier. If you can't figure out a way to bolt it very securely to the enclosure, then you're better off with a two prong plug.

Ready to build? We have the kit.
Would you like a Ready to Solder Circuit Board for this project?