
Pedal Board
I built my pedal board out of a suitcase! You’d think it would look pretty cheesy but it worked out great. I bought the suitcase at a thrift store for $2.00 (United States Dollars), did some minor remodeling, slapped some stickers on and I’m ready for the open road! This project is quite a bit different from the others on this site. It requires no electronics skills or electronics-bench tools. It does require some basic wood working tools. Here’s the tools you’ll need:
- A saw. Any saw that will make some two or three foot cuts across three-eighths inch plywood.
- A Phillips screw driver.
- A paint brush. Two or three inch wide to paint the plywood.
- A drill is handy but not necessary. The drill is used to drill pilot holes for the screws and screw in the wood screws.
- I also used a Dremel tool with cut-off wheel to remove the hinges and handle from the suitcase. This is not required if you can figure out your own way to remove the old suitcase hardware.
Bill Of Materials
- 1 – Sizable suitcase, I recommend a well used case, this adds character to your pedal board.
- 1 – Fender replacement amp handle or other similar.
- 8 – Fender replacement amp feet or similar (optional).
- 2 – Guitar case replacement latches (you might need 4, see instructions)
- 8 – Nuts, bolts and washers to fit the case latches. Since these latches are usually riveted on, they don’t come with any attachment hardware. Small nuts, bolts and washers will work.
- 1 – Small sheet of three-eighths inch plywood (see instructions for size)
- Half inch Phillips screws
- Flat black paint
- Wood glue
- Lots of Velcro and epoxy glue
- Fabric glue (optional)
- Foam rubber (optional)
- Black felt (optional)
Instructions
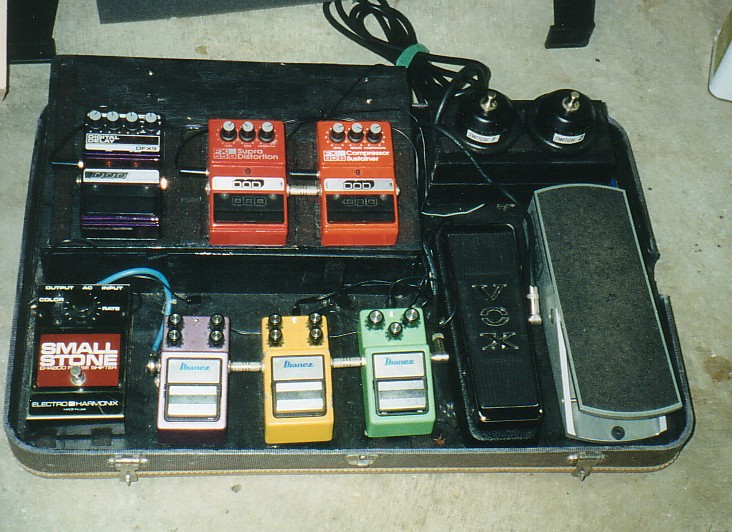
The pedals will be attached to the lid of the suitcase and the body of the suitcase will become the carrying case lid for your pedal board. Most suitcases will need a little extra reinforcement under the pedals to really make it sturdy enough to hold together and support the pedals.
- Remove the hinges from the suitcase.
- Cut a piece of three-eighths inch plywood to fit the inside of the lid.
- Glue and screw the plywood to the suitcase lid. The screws will have to be screwed in from the outside. I bought some black colored screws and they are not very noticeable. The side of the case with the screws is facing the floor most of the time anyway. Be careful screwing them in if you’re using an electric screw driver (or drill). Usually the lid is pretty thin cardboard-type material and you don’t want to screw down too far, or slip off the screw head and scratch the case.
- Paint the plywood black (optional)
- Glue down the “hook” side of the Velcro all over the plywood board.
- Glue the “loop” side of the Velcro to the bottom of your pedals.
- Remove the suitcase handle and put on the heavy duty amp handle. This is somewhat optional but my board is pretty heavy so I think it is a good idea. I reinforced the attachment of the amp handle (and amp feet) with small pieces of one-eighth inch plywood on the inside of the case and painted black.
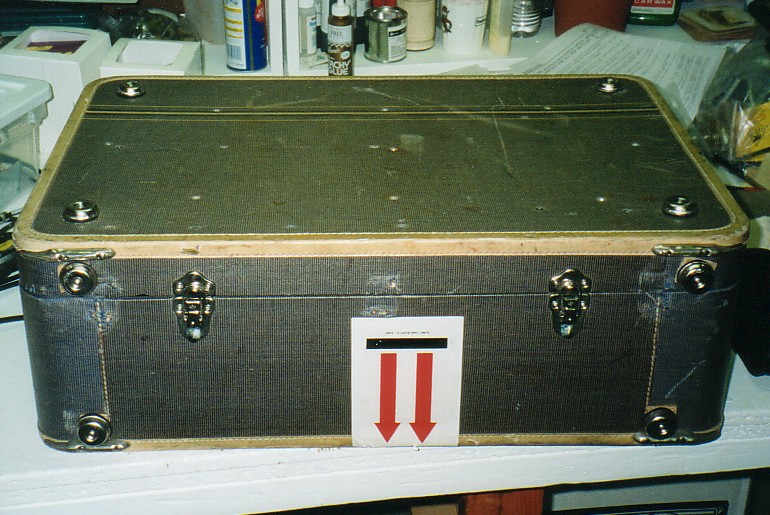
- Add the amp feet. I used feet on the bottom as it lays down and as it stands up. This Picture shows the case upside-down so you can see the amp feet placement (and the guitar case latches that were added in the next step).
- Add the new latches. On the case I used, the latches already there were suitable, so I left those there and just added latches on the side where the hinges used to be. Chances are you’ll need to remove the cheap suitcase latches and replace them with 2 more guitar case latches.
- I added foam covered with black felt to the inside of the “lid” of the pedal board, to help hold the pedals in place during transport. It took some fitting to get the foam to the right heights. I didn’t want the foam to be pressing down too hard on the pedals and cause unnecessary wear on the pedal switches.
Other Notes
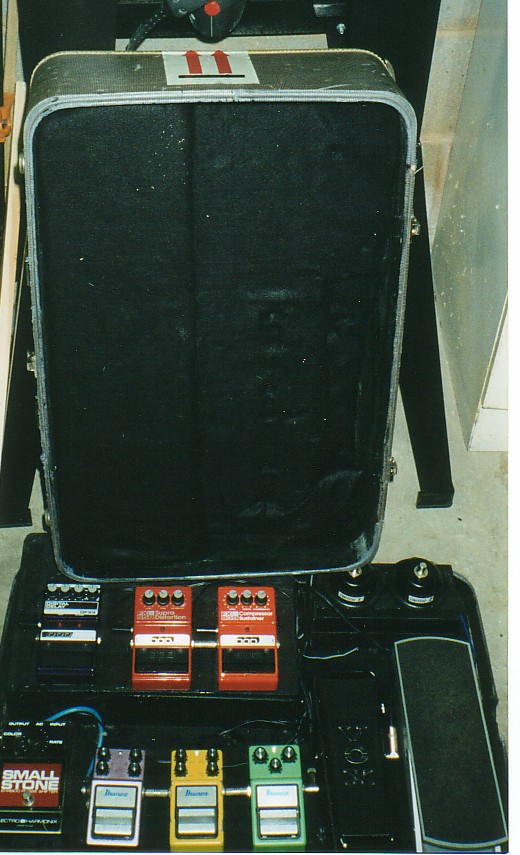
Here’s a picture of what the case looks like ready for transport by my “roadie” Sam. Here are some more miscellaneous notes on this project.
- I got my case latches from Stewart-MacDonald’s. Item # 1631
- I got my amp handle and feet from a local music store. Stewart-MacDonald’s sells amp handles too, but they’re not as good (easy to install) as the Fender replacements.
- My board is actually two-tiered. I built in a little hinged-lid slope-topped box out of one-eighth inch plywood attached right to the board. Under the lid is all my power supply stuff and the second row of pedals are easier to stomp sitting on top the box lid. The foam lining in the lid is also two-tiered to match the contour.
- Stewart-MacDonald’s also sells black tolex and amp corners, if you feel you need them.
- Gluing on the Velcro , so that it won’t come off, is not easy. Here are some things I’ve figured out:
- Carefully follow the directions on the side of the tube of epoxy. This is for us manly men who “do first, and read directions later if it didn’t work”…when will I ever learn!!!
- I use an Exacto knife to rough up the surface of the board where the Velcro will be before I glue the Velcro on. Doing this has pretty much put an end to the Velcro coming off the board. You can also use small tacks on the ends of the pieces to keep them attached to the board.
- I use an Exacto knife to rough up the surface of the pedal bottom before gluing on the velcro too. Yes, the knife will score metal, if you don’t mind seriously dulling the tip of your knife blade.
- If your pedal has a rubber mat on the bottom of it, peel it off. I don’t know of any way to get the velcro pieces to get a good hold on rubber.
- If you have pedals that have feet that need to stay on (wah-wah and volume pedals), carve divots into the board to allow the feet to sink down into the board and the bottom of the pedal (covered with Velcro) to contact the surface of the board. I used my dremel tool to make nice little round indentations in the board where my wah and volume pedal feet sit. The down side of this is that you loose a little flexibility for rearranging pedal placement on the board, but that’s the price I pay.
- I used a product called Tacky Glue to attach the foam and felt to the carrying case lid. this is available at fabric stores and works great for holding fabric together and holding it to hard surfaces.
This project may take some twists and turns from the original recipe, depending on the suitcase you use. Let me know how yours turns out or if you come up with other ideas for this project.