
Project · Boosters & Volume
Effects Order Switch Boxes
Project files
Everything you need to build it
Schematic
Schematic
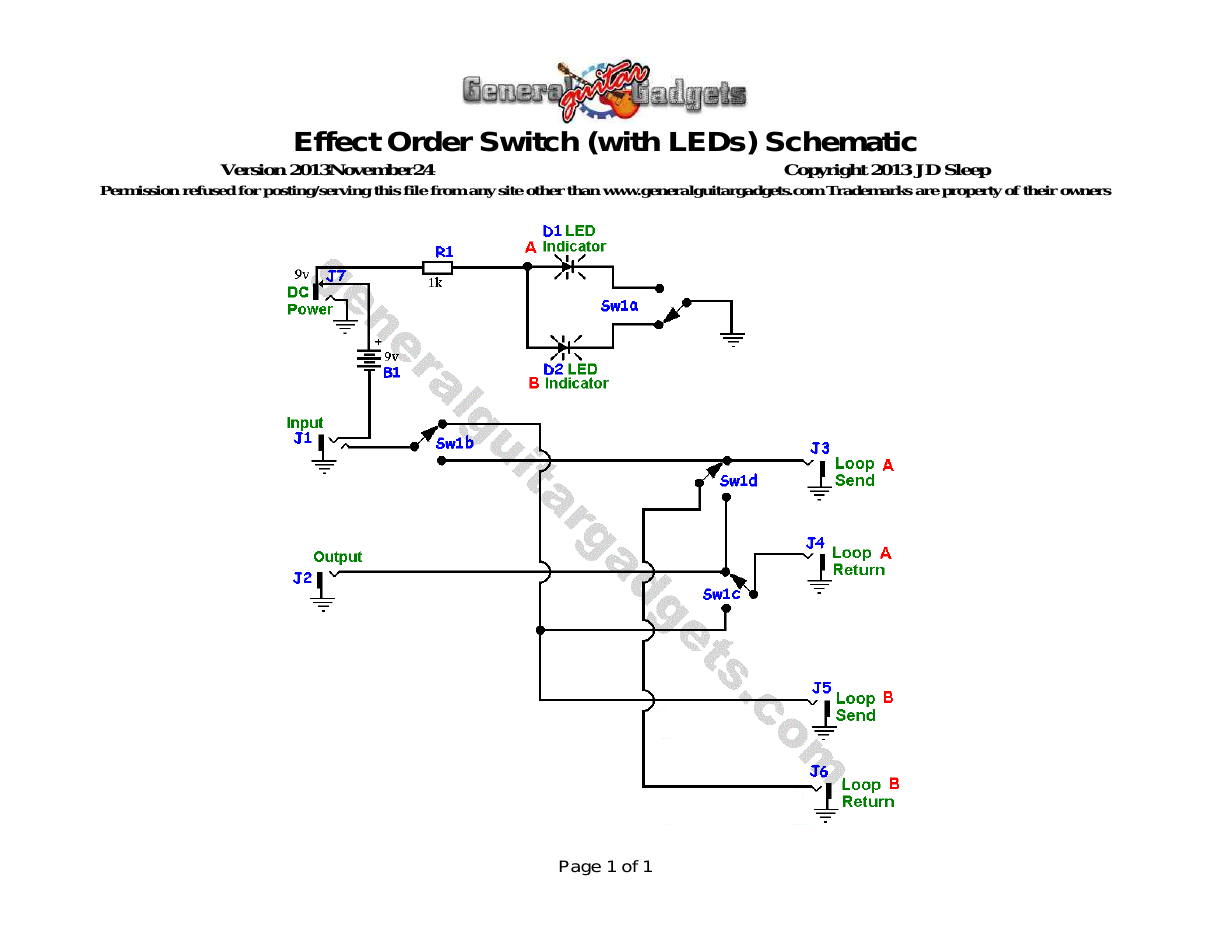
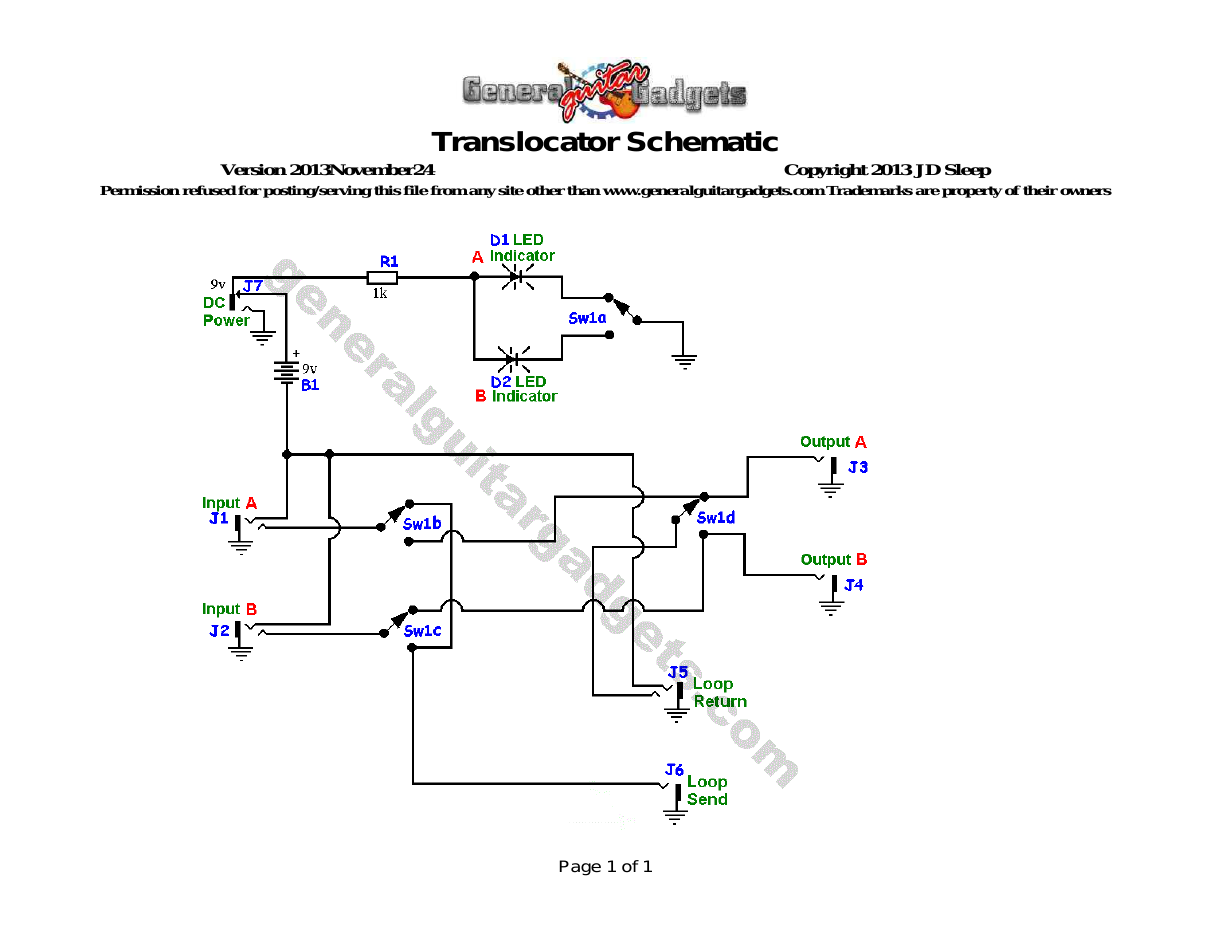
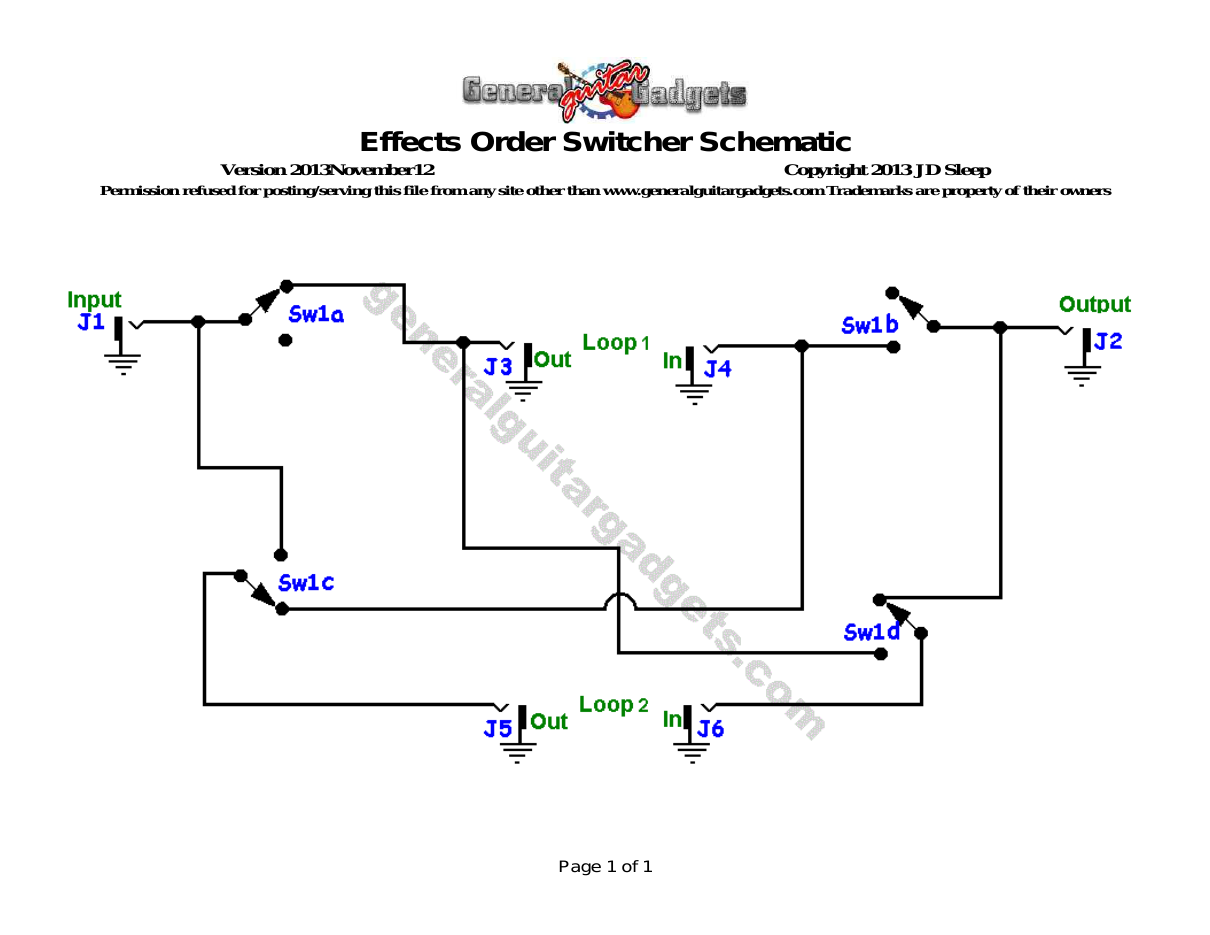
Parts layout
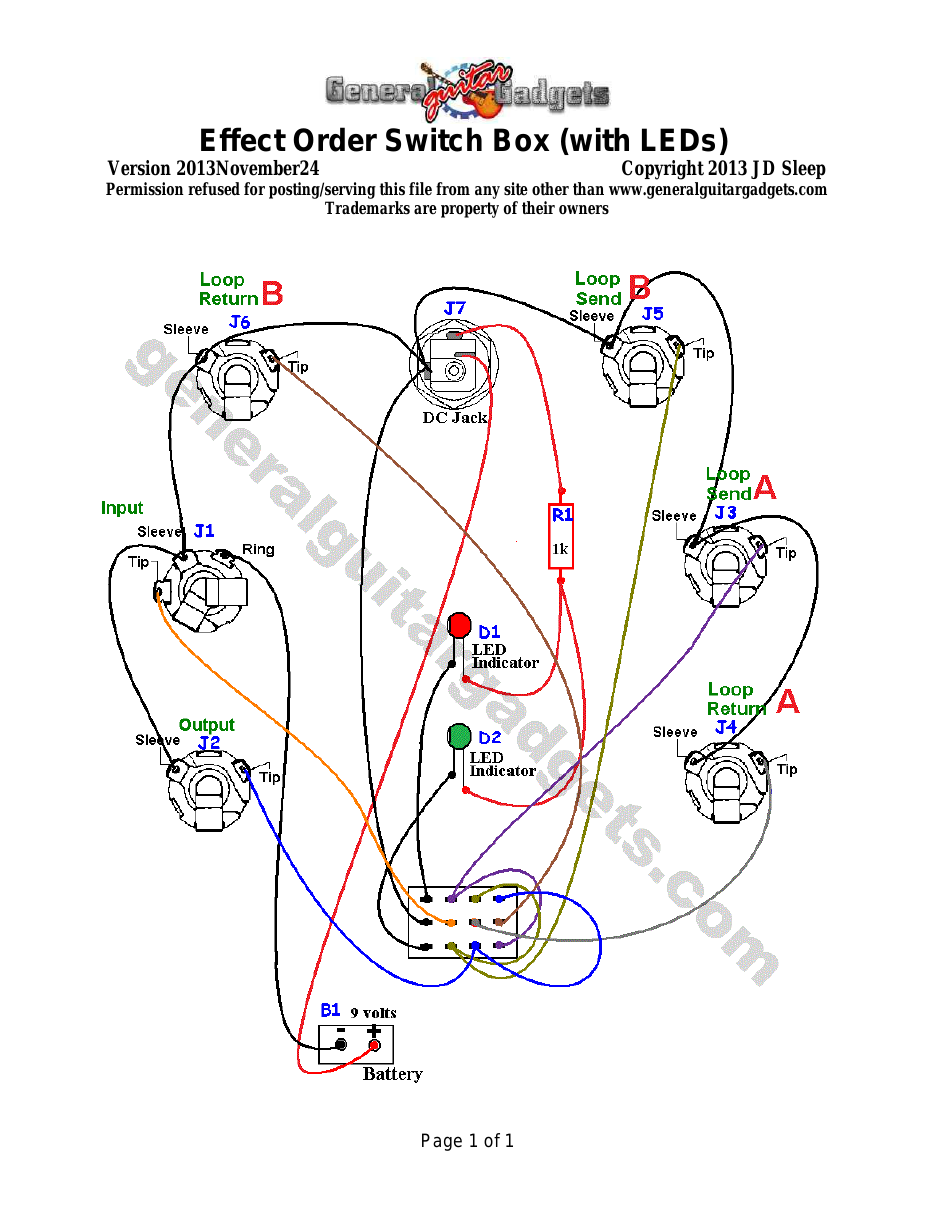
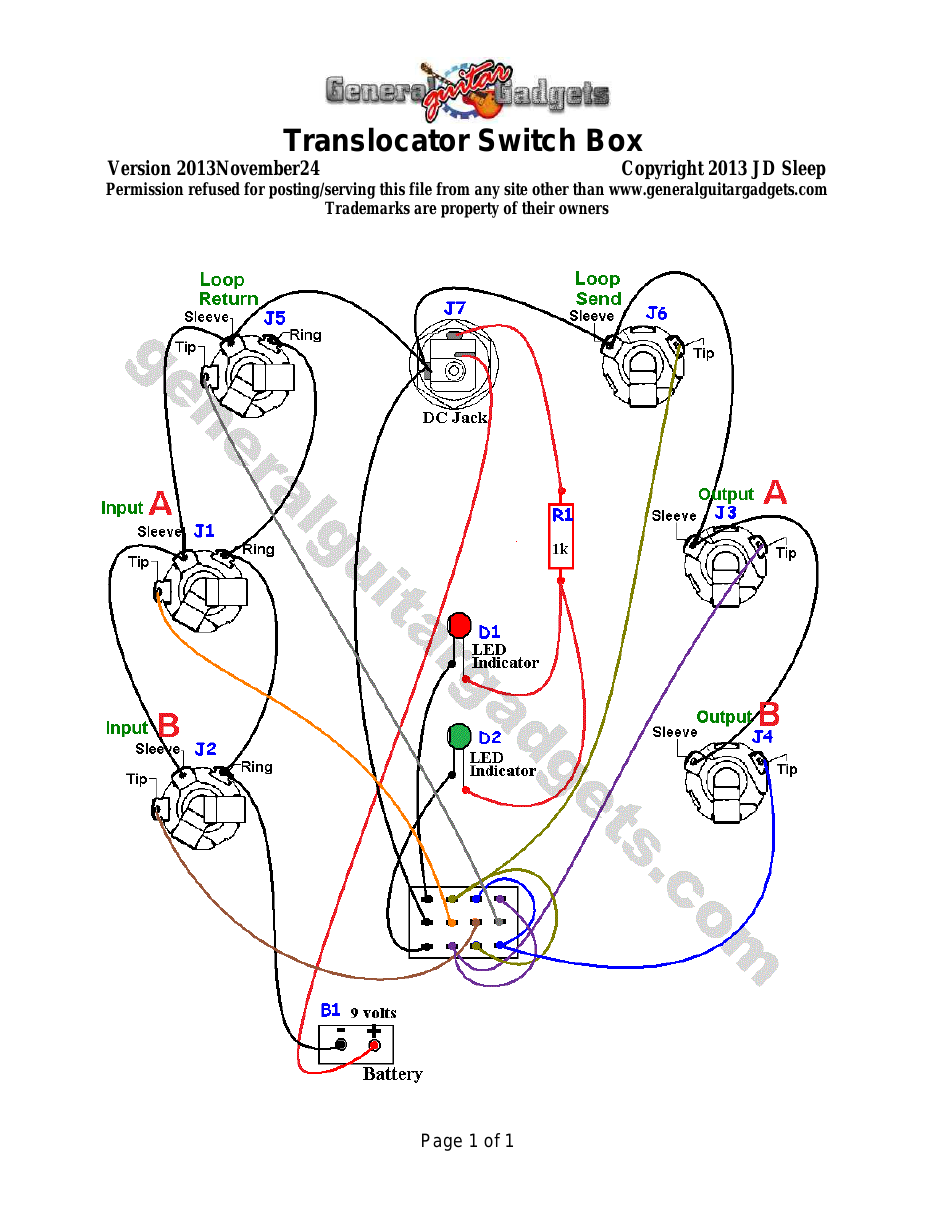
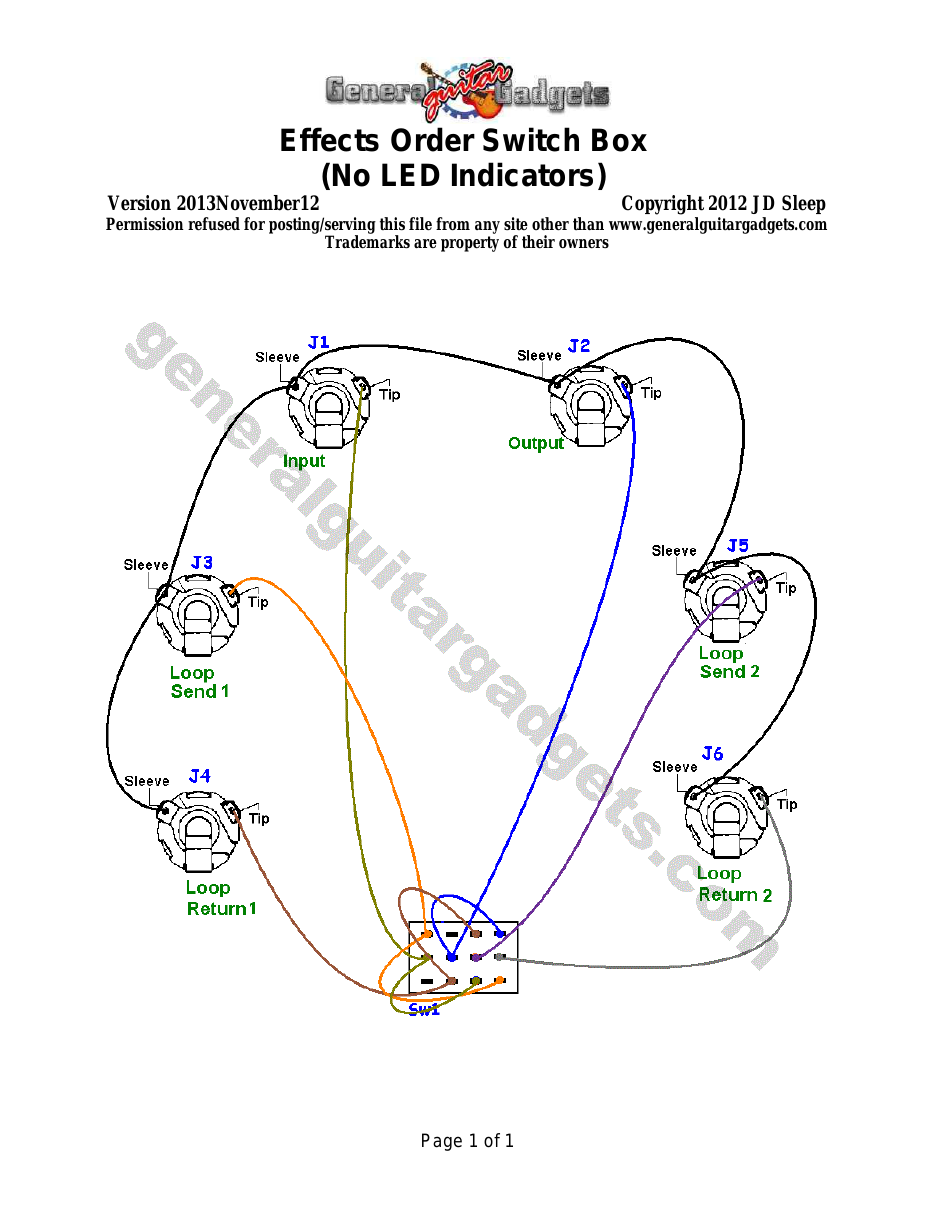
Parts Layout / Wiring Diagram
What you will need
Bill of Materials
Version 2013November24 · Copyright 2013 JD Sleep · Permission refused for posting/serving this file from any site other than www.generalguitargadgets.com · Trademarks are property of their owners
Resistors
Other
| Part ID | Part Name |
|---|---|
| D1 | “A” Status indicator Red LED |
| D2 | “B” Status indicator Green LED |
| J1 | Stereo quarter-inch jack (Input) |
| J2 | Mono quarter-inch jack (Output) |
| J3 | Mono quarter-inch jack (Loop Send A) |
| J4 | Mono quarter-inch jack (Loop Return A) |
| J5 | Mono quarter-inch jack (Loop Send B) |
| J6 | Mono quarter-inch jack (Loop Return B) |
| J7 | DC Jack |
| B1 | 9 volt battery (not included in the Kit) |
| Sw1 | Heavy Duty 4PDT foot switch 9v battery snap, 2 LED mounting clips 24 gauge stranded wire, Enclosure |
How to build it
Instructions
Effects Order Switch Project Instructions
Version 2013December05 · Copyright 2013 JD Sleep · Permission refused for posting/serving this file from any site other than www.generalguitargadgets.com · Trademarks are property of their owners
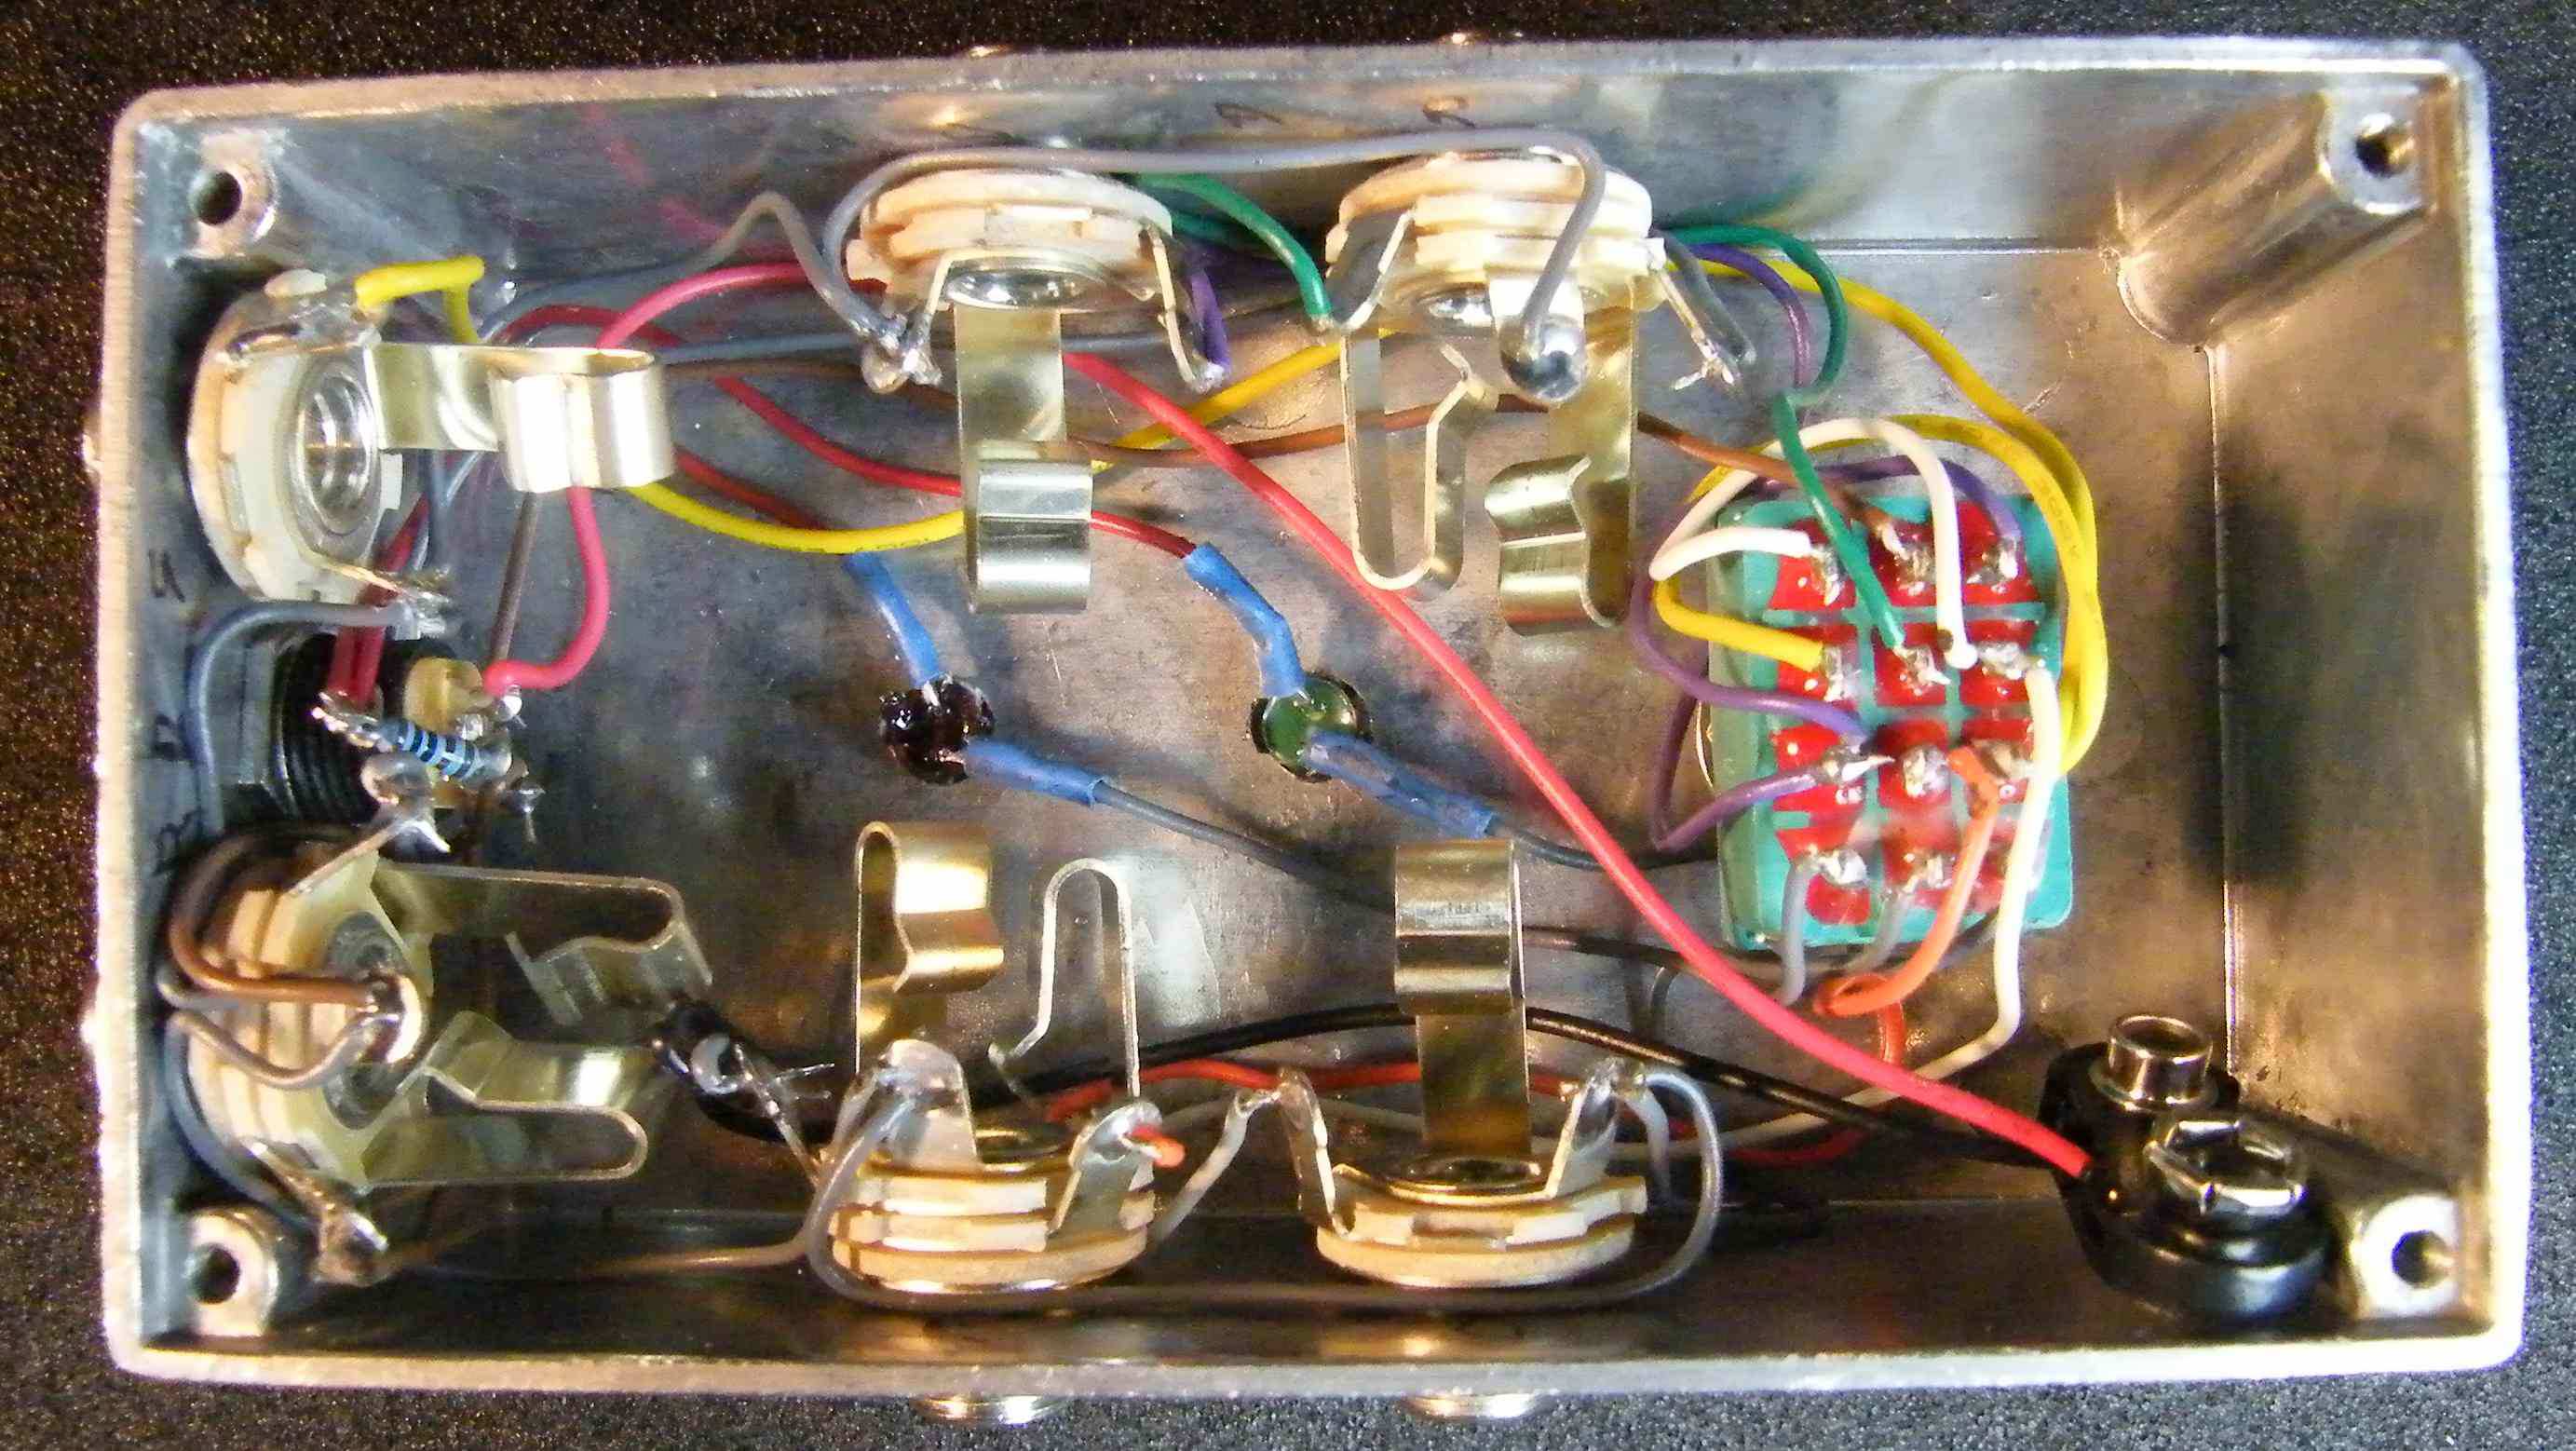
This simple and exciting switching device can add a wide variety to your sonic palet. Construction is very simple. With one click of a foot switch, you can change the order of two loops of effects back and forth. This is a passive device (except for the LED power), so there is no circuit board, just wire up the switch, jacks and LEDs. Use the project documents provided, starting with the General Build Instructions. Wire the jacks, switch, resistor and LEDs according to the wiring diagram. Start by solder tacking the wiring to the LEDs and then wire the jacks and the switch.
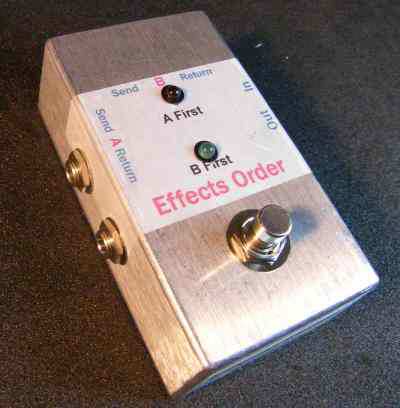
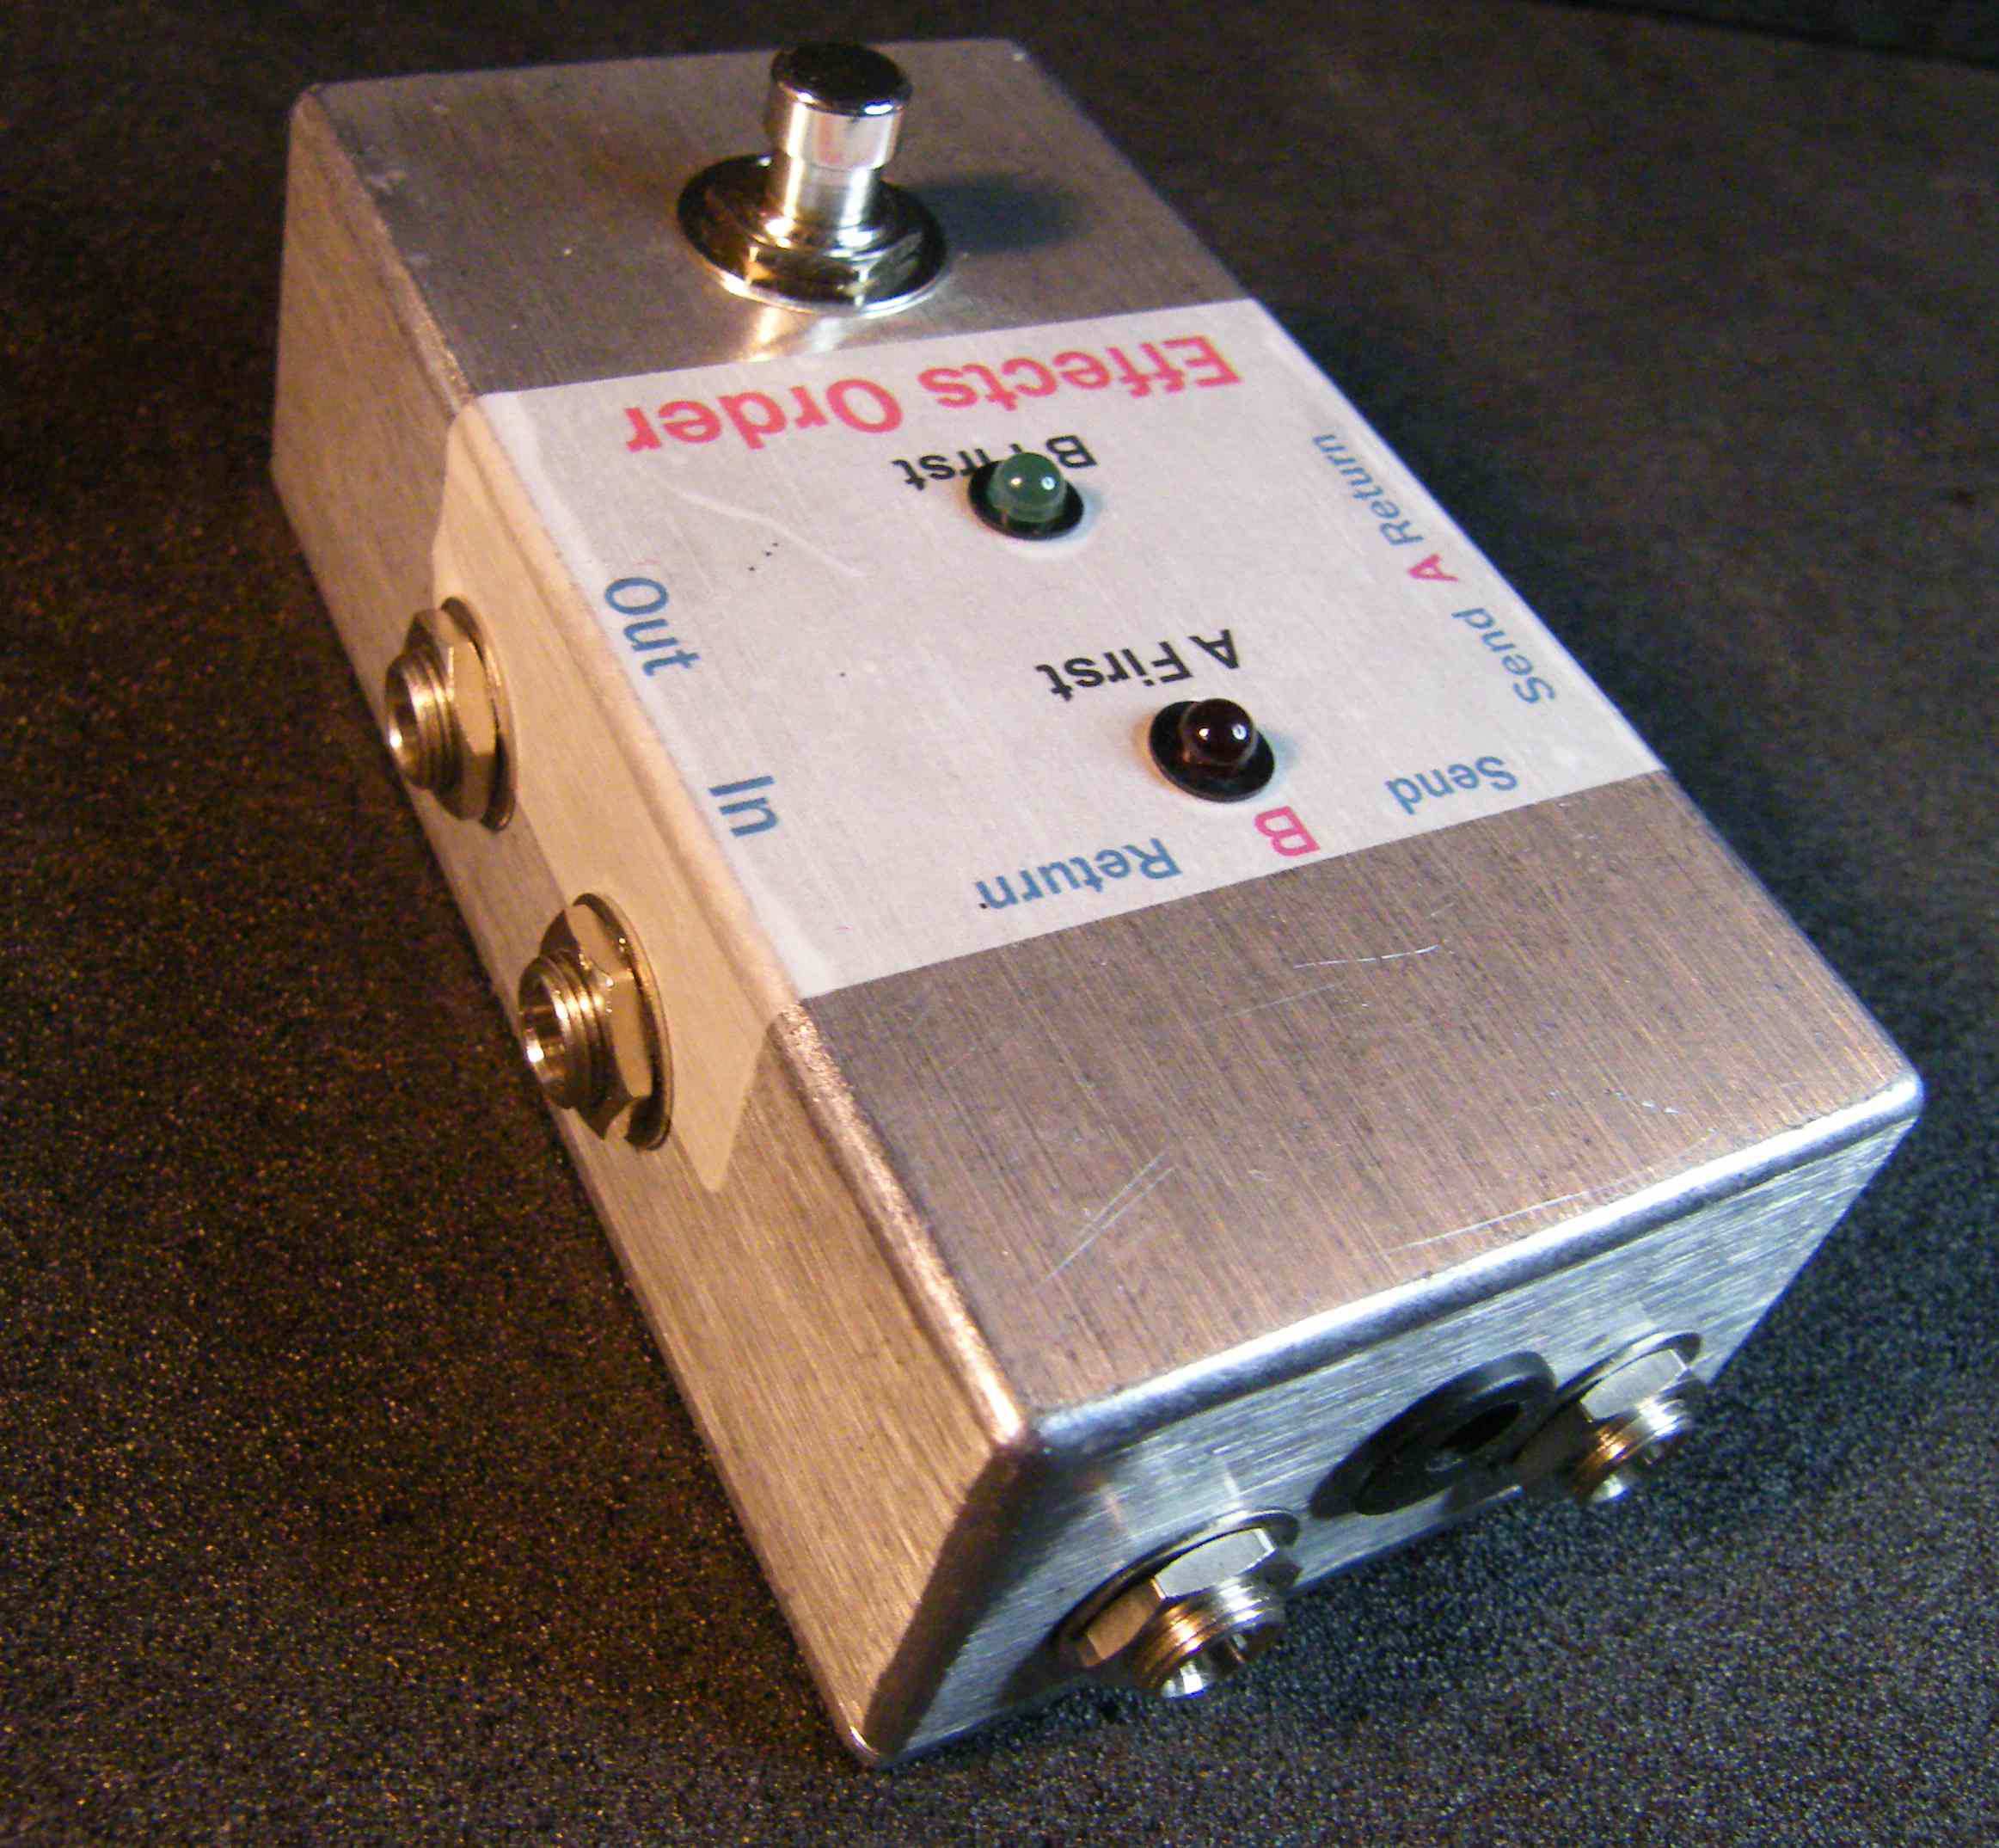
Here's an inside view of the unit we built to give you a real view of the construction.
Translocator Project Instructions
Version 2013November17 · Copyright 2013 JD Sleep · Permission refused for posting/serving this file from any site other than www.generalguitargadgets.com · Trademarks are property of their owners
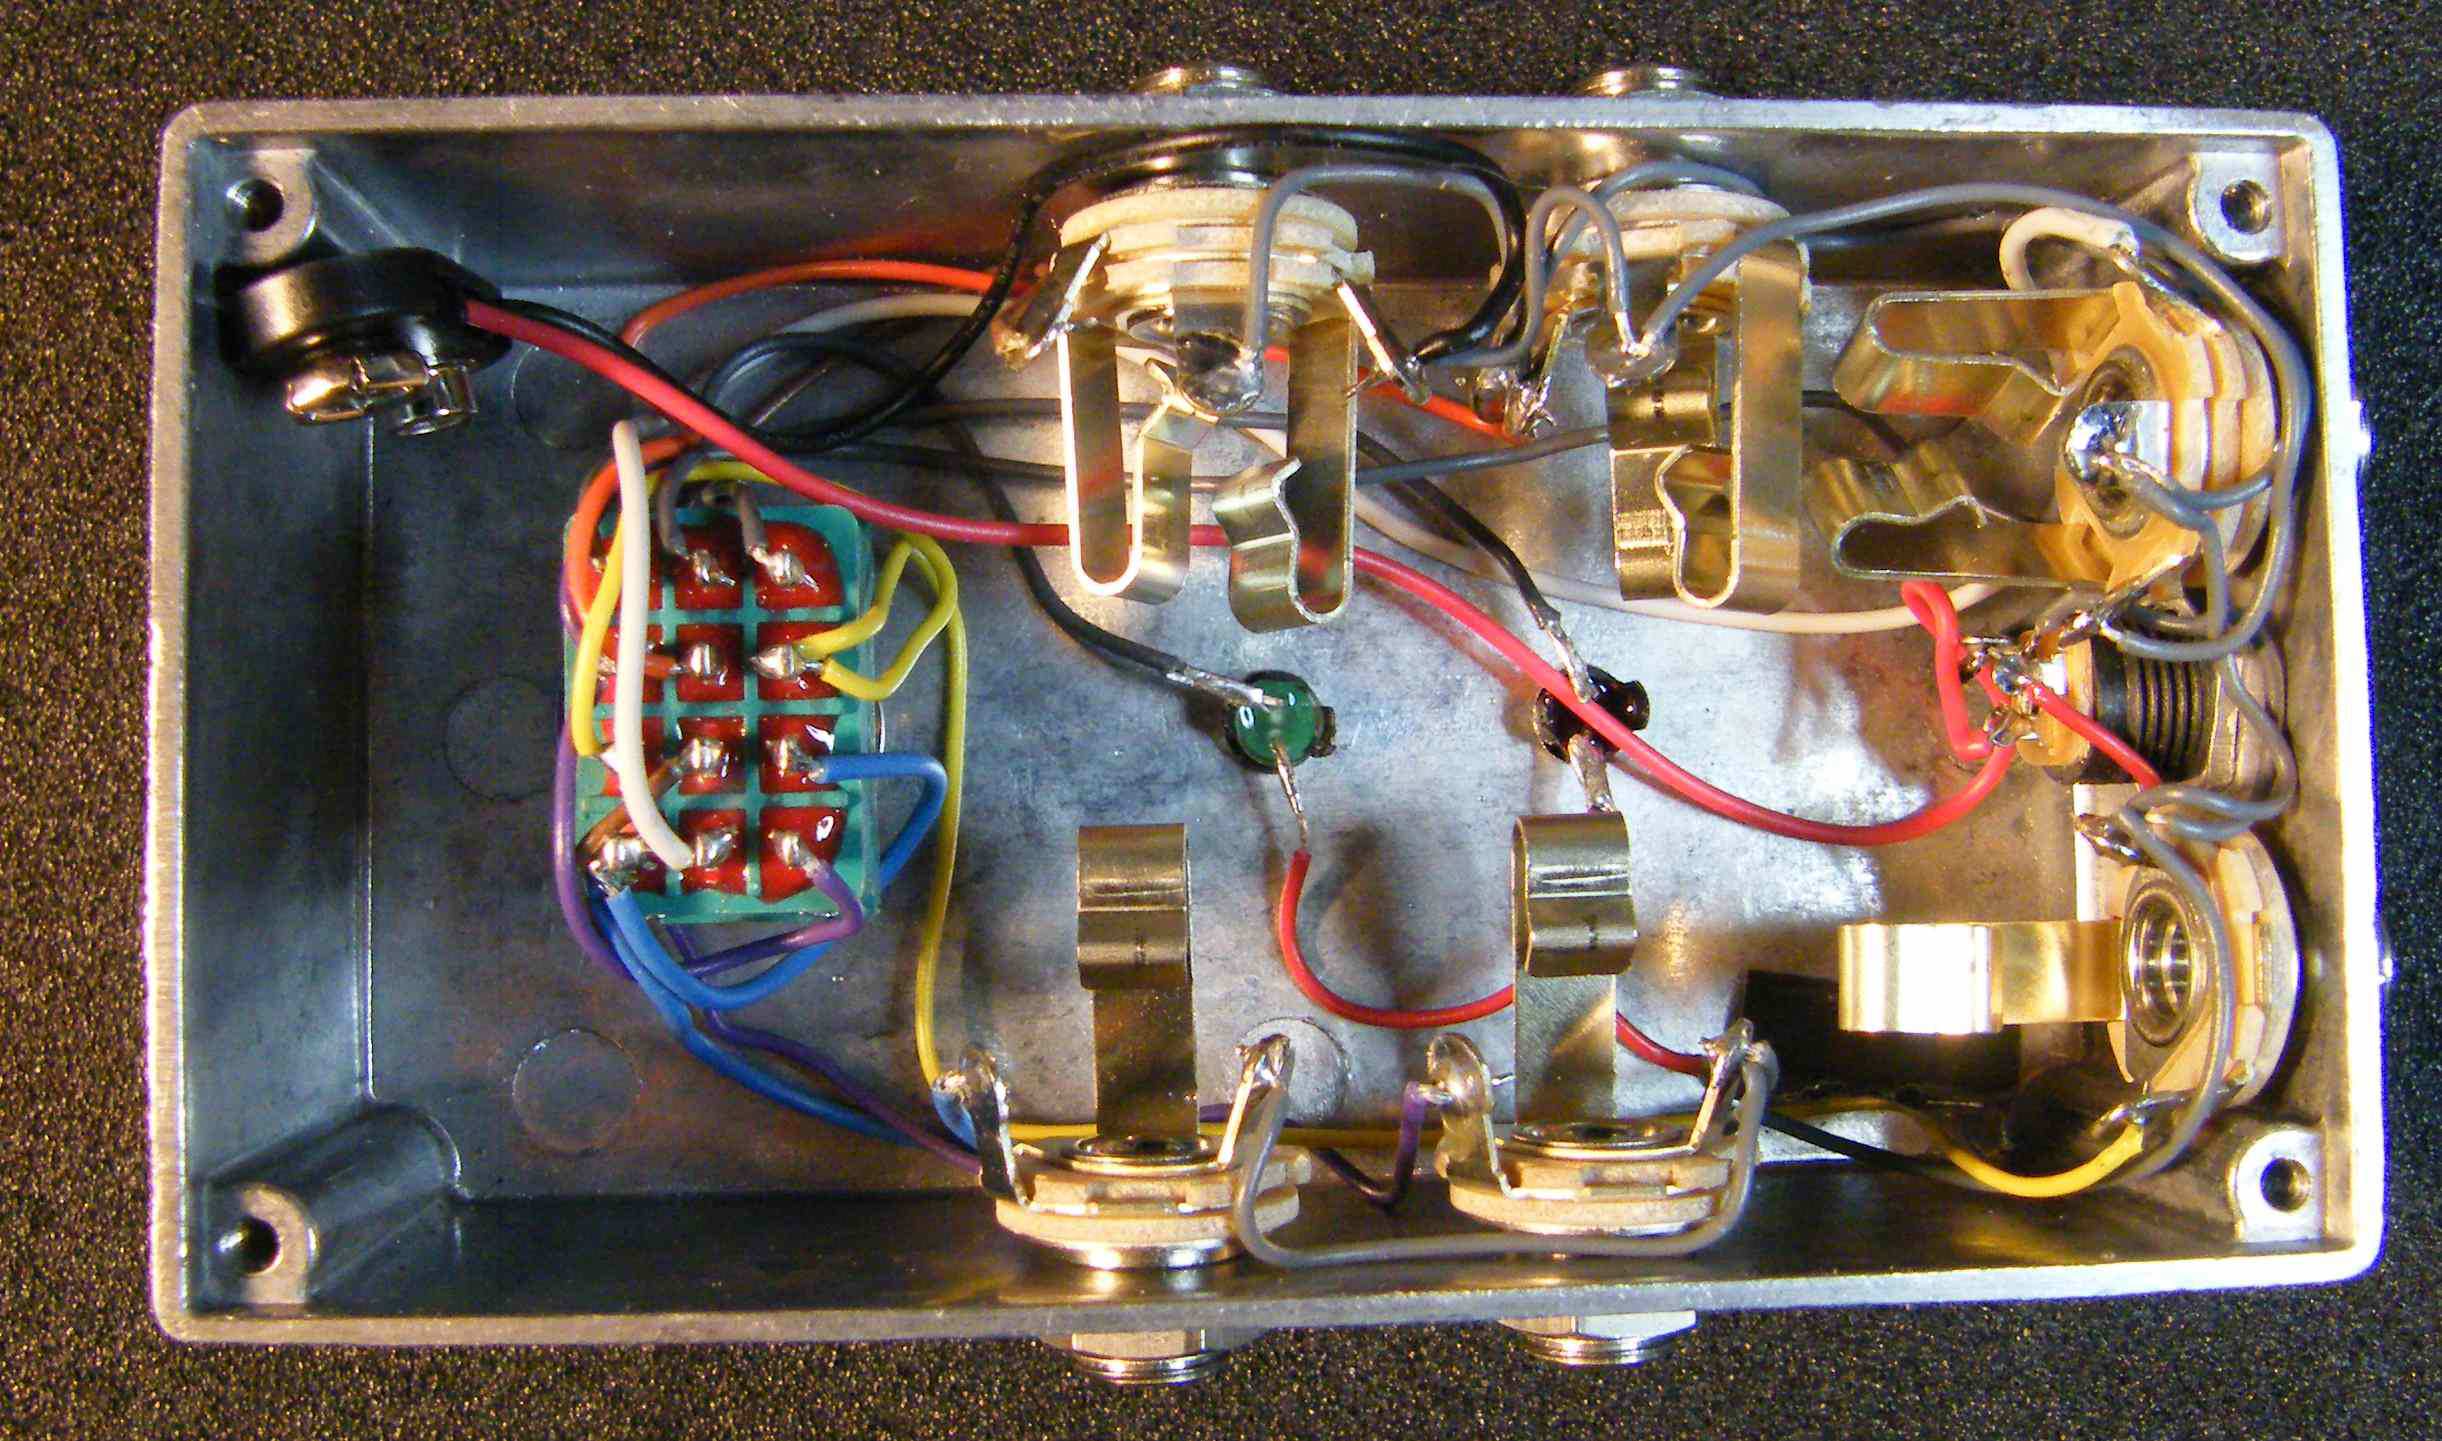
This is an absolutely awesome switching device. Construction is very simple. This is a passive device, so there is no circuit board, just wire up the switch, jacks and LEDs. Use the project documents provided, starting with the General Build Instructions. Wire the jacks, switch, resistor and LEDs according to the wiring diagram. Start by solder tacking the wiring to the LEDs and then wire the jacks and the switch.
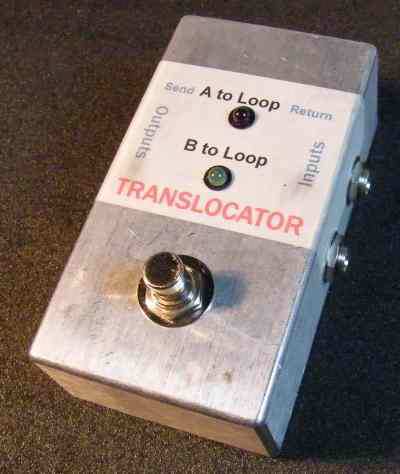
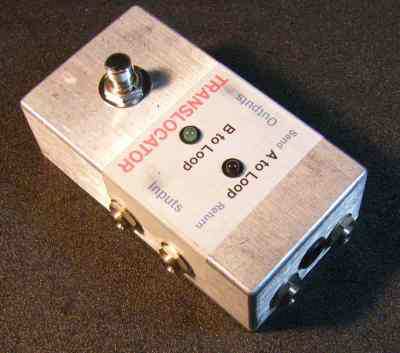
Here's an inside view of the unit we built to give you a real view of the construction.
Old version Effects Order Switch Project Instructions
Version 2013November24 · Copyright 2013 JD Sleep · Permission refused for posting/serving this file from any site other than www.generalguitargadgets.com · Trademarks are property of their owners
This is a great stompbox to have on your pedal board or in your studio. For example be able to switch your compressor from beginning to the end of your effects chain. Construction is very simple. This is a passive device, so there is no circuit board, just wire up the switch, jacks. Use the project documents provided, starting with the General Build Instructions. Wire the jacks and the switch according to the wiring diagram.

More about this project
Notes, sounds and related links
Effects Order Switcher
Here is a great way to add versatility to your pedals. Switching the order of your effects can sometimes give the subtle (or not so subtle) differences that you may want to have access to with a push of a button. It uses a 4PDT footswitch and has LED indicators to show which order you are using. This can be used with two single stompboxes or combinations of loops of stompboxes.
TransLocator
This is an unbelievably versatile signal routing machine. It can do A/B switching, Loops and an Effects order changer. See the Operating Instructions below. This is a great tool for your test bench, home studio or pedal board. You'll need to keep a printout of the operating instructions with it. It's not always intuitively obvious how to use it and get the most out of it.
Special note: If you want a "Dual Effects Loop Switch box", do not use Application 7 with the the TransLocator. Use the Dual Effects Loop Switch box for switching between two effects loops. The grounded inputs in that wiring will solve noise problems. All other Applications of the TransLocator seem to work well.
Note: this project is basically the same as the "Effects Order Switcher" (see project at the top of the page) with some labeling switched as the Translocator Operating Instructions below indicate.
3rd Note: You can build the Translocator with the Effects Order Switcher Kit (see link below).
Craig Anderton Effects Order Switcher
Here's a very simple effects order switch box that is what Craig Anderton has in his excellent book Do-It_Yourself Projects For Guitarists. We recommend the switch box at the top of the page since it has LED indicators to show which order you are using.
Buy an Effects Order Switcher Kit

Ready to build? We have the kit.
Buy a Effects Order Switch Box Complete Kit. Includes all the parts and materials you need to build one, all for about the price you would pay for the parts.