
Project · Amps
A386 Amp
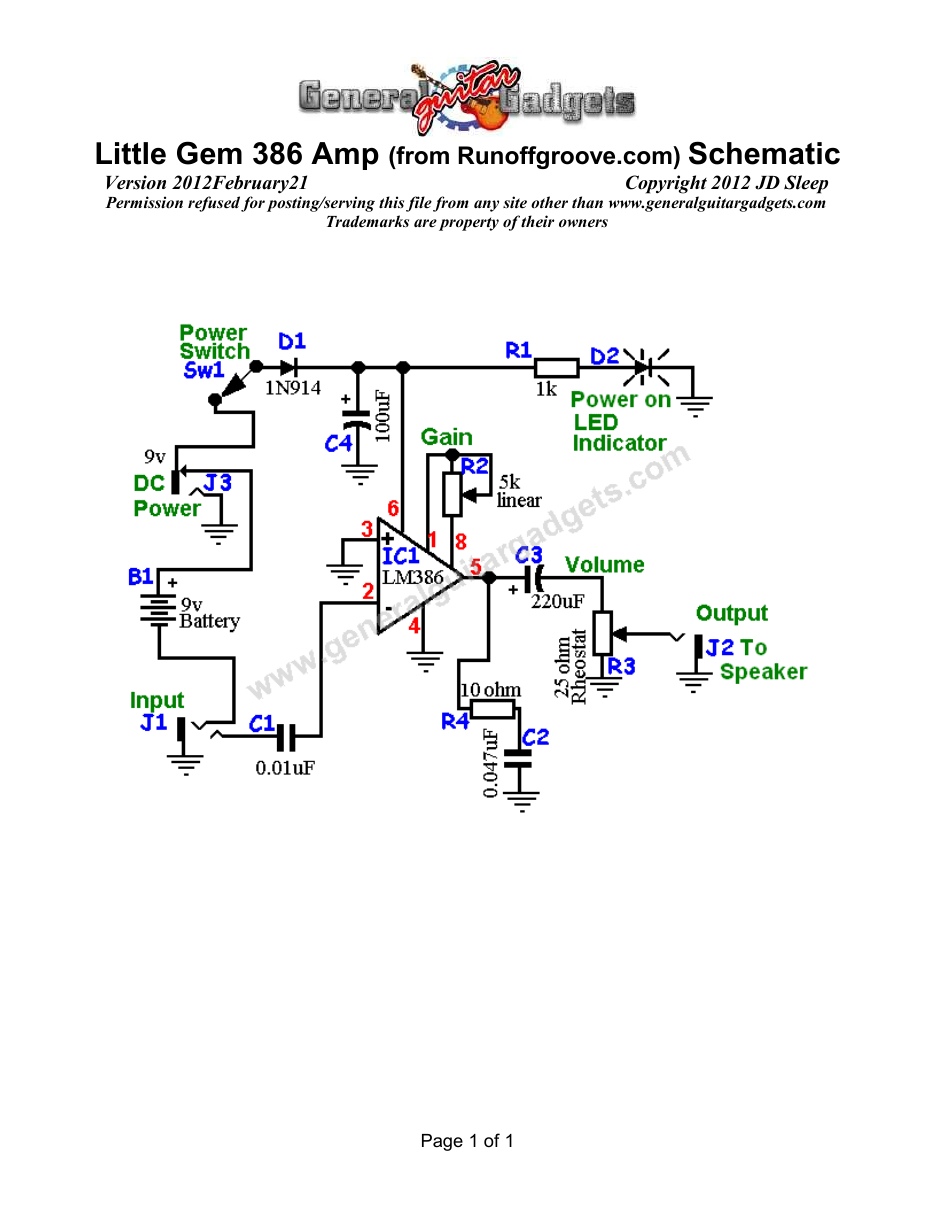
This is the A386 Amp, based on the LM386 IC. Thanks to this article on BlueGuitar.org for the great info on making the Smokey something better, and to runoffgroove.com for the Lil Gem , which you can build on this PCB.
Project files
Everything you need to build it
What you will need
Bill of Materials
Version 2010January · Copyright 2010 JD Sleep · Permission refused for posting/serving this file from any site other than www.generalguitargadgets.com · Trademarks are property of their owners
Resistors
| Resistor ID | Value | 3-band Marking | 4-band Marking |
|---|---|---|---|
| R1 | 1k | brown-black-red | brown-black-black-brown |
| R4 | 10 ohm | brown-black-black | brown-black-black-gold |
Potentiometers
| Part ID | Value | Type |
|---|---|---|
| R2 - Gain Control | 5k | Linear Taper |
| R3 - Volume Control | 25 ohm | Rheostat |
Capacitors
| Capacitor ID | Value | Type | Possible Marking |
|---|---|---|---|
| C1 | 0.01µF | Film | 103 |
| C2 | 0.047µF | Film | 473 |
| C3 | 220µF | Aluminum Electrolytic | 220µF |
| C4 | 100µF | Aluminum Electrolytic | 100µF |
Other
| Part ID | Part Name |
|---|---|
| IC1 | 386 opamp |
| J1 | Mono quarter-inch jack |
| J2 | Mono quarter-inch jack |
| J3 | DC Jack |
| B1 | 9 volt battery 9v battery snap & holder, Ready-to-solder Printed Circuit Board 24 gauge stranded wire, Enclosure, Knobs |
How to build it
Instructions
Version 2012March09 · Copyright 2006 JD Sleep · Permission refused for posting/serving this file from any site other than www.generalguitargadgets.com · Trademarks are property of their owners
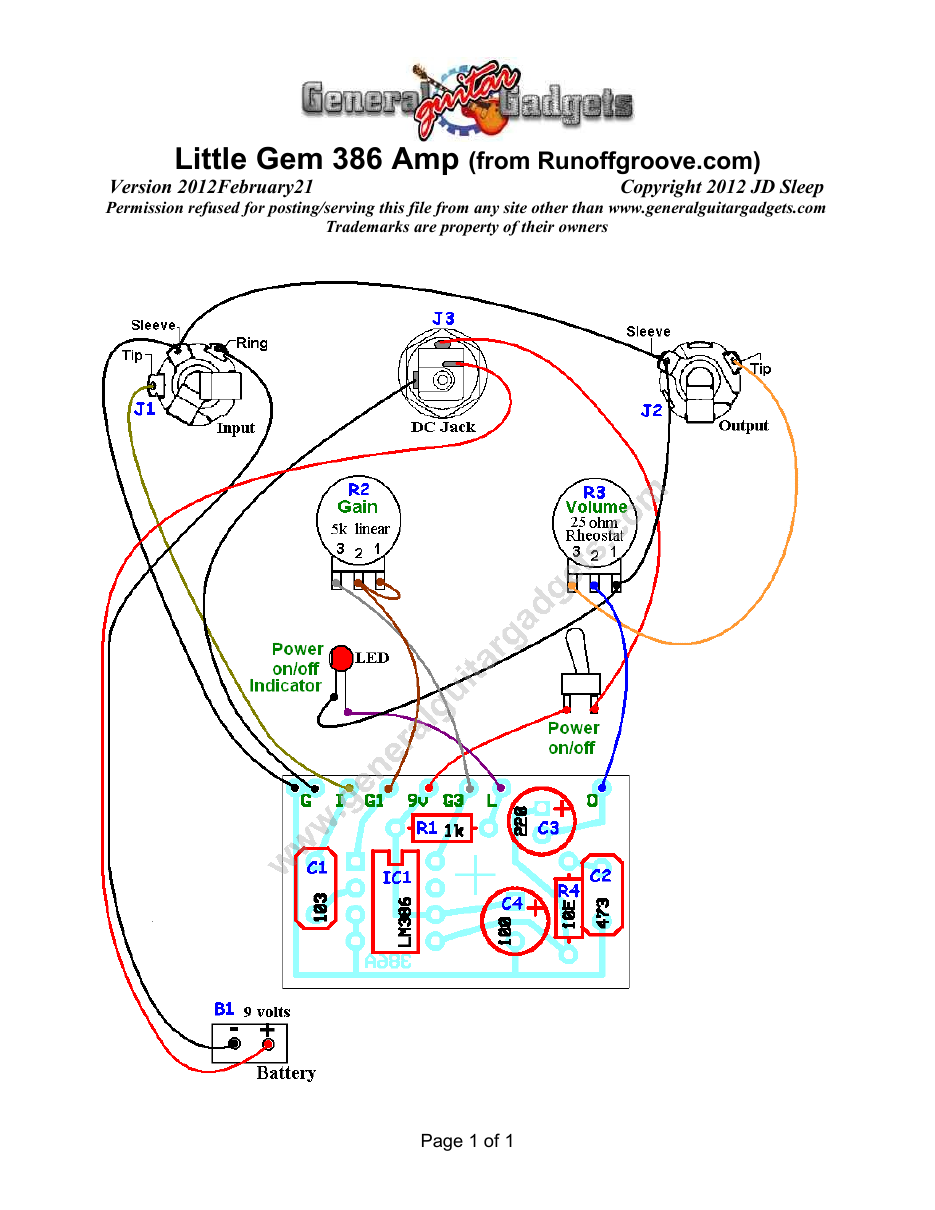
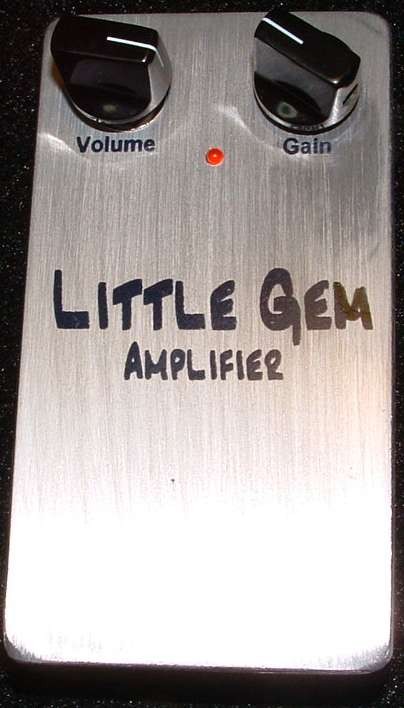
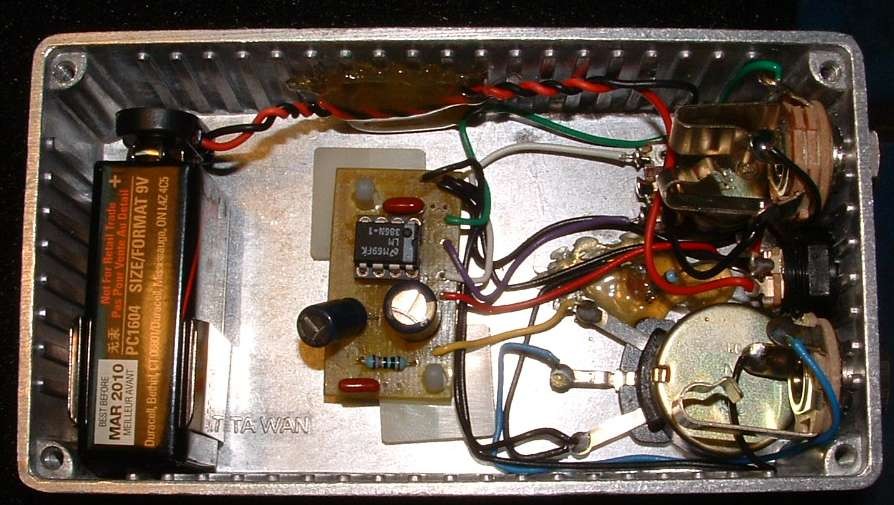
This is a small amp similar to the "Smokey" amp and others from www.runoffgroove.com. Use the link to the site to see the schematic. This is a relatively simple effect to build. We built ours a long time ago in a “ribbed” Small Bear 125B enclosure that is no longer available. We also did a “funky” installation of the LED with hot glue. It looks nice from the outside, but if it ever goes out, it will be more difficult to replace. We used a Mouser 534-080 to hold the battery in place. We wired the on/off switching to a stereo input jack as is done in almost all the other projects on the site. The layout diagram has a toggle switch on/off like a real amp. You can wire it either way or with both as in the wiring diagram. If you want just the toggle on/off switch, you can use a mono input jack and wire the black battery snap lead to any ground point. If you want just the input jack on/off, then run the red wire from the “9v” pad on the PCB directly to the DC Jack. Use the project documents provided, starting with the General Build Instructions. There should be no other instructions need to make this simple little amp. Here's an inside view of the unit I built to give you some general ideas if needed. This is a nice little amp to have around the studio or bedroom. Have fun, comments and questions are welcome and can be sent to [email protected]
More about this project
Notes, sounds and related links

Ready to build? We have the kit.
Would you like a Ready to Solder Circuit Board for this project?