
Project · Distortion
Overdrive Crunch Distortion
The great sounds of crunch for some folks with mild Neurosis. For connoisseurs of fine distortion. Fantastic sound for a fairly heavy distortion sound that just sounds awesome!
Project files
Everything you need to build it
OC Distortion Ready-For-Transfer Printed Circuit Board Layout For use only if you are a complete DIY person who wants to etch and drill your own PCB. Otherwise, we recommend you ignore this PCB mask and buy the Ready-to-Solder Printed Circuit Board or Complete Kit from the links below.
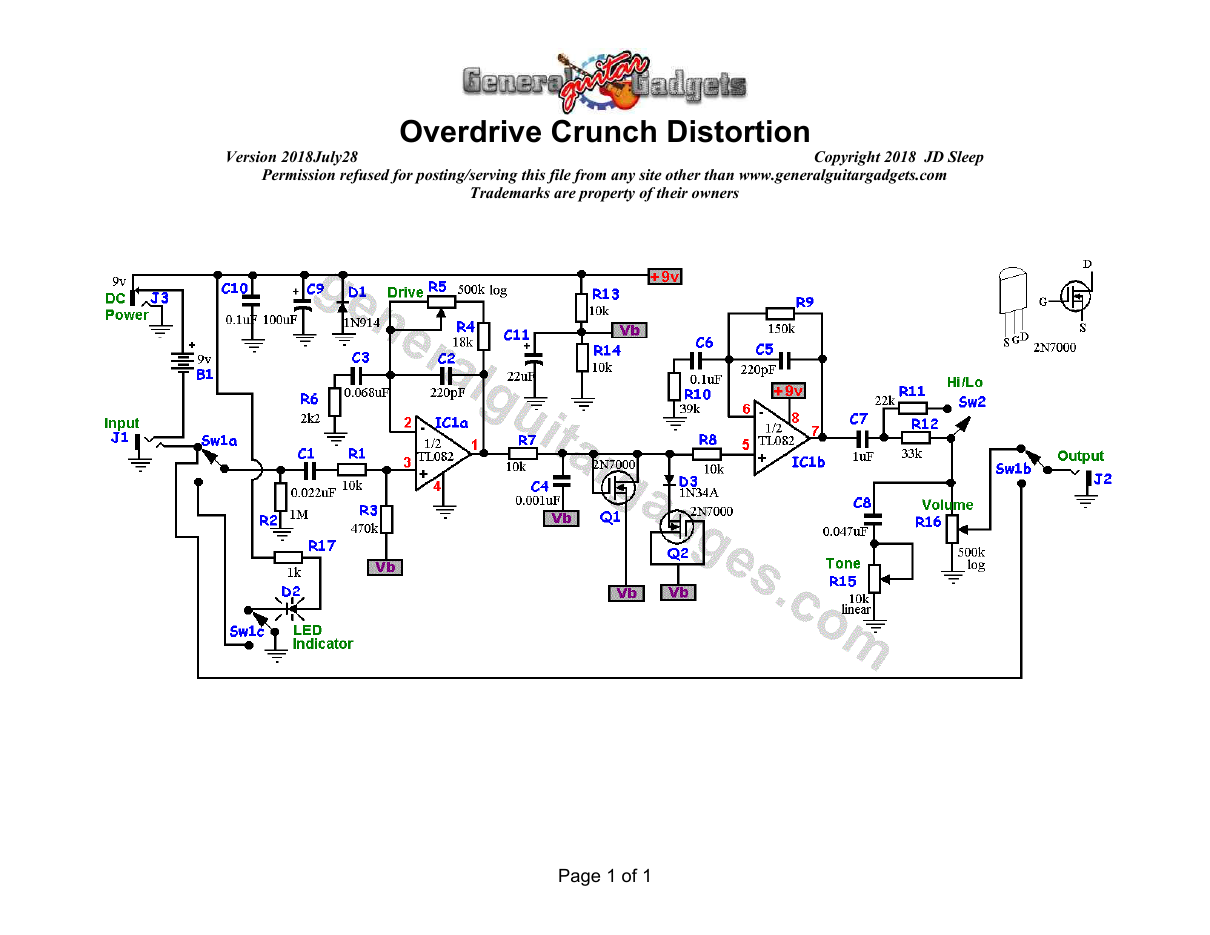
Parts layout
Parts Layout / Wiring Diagram
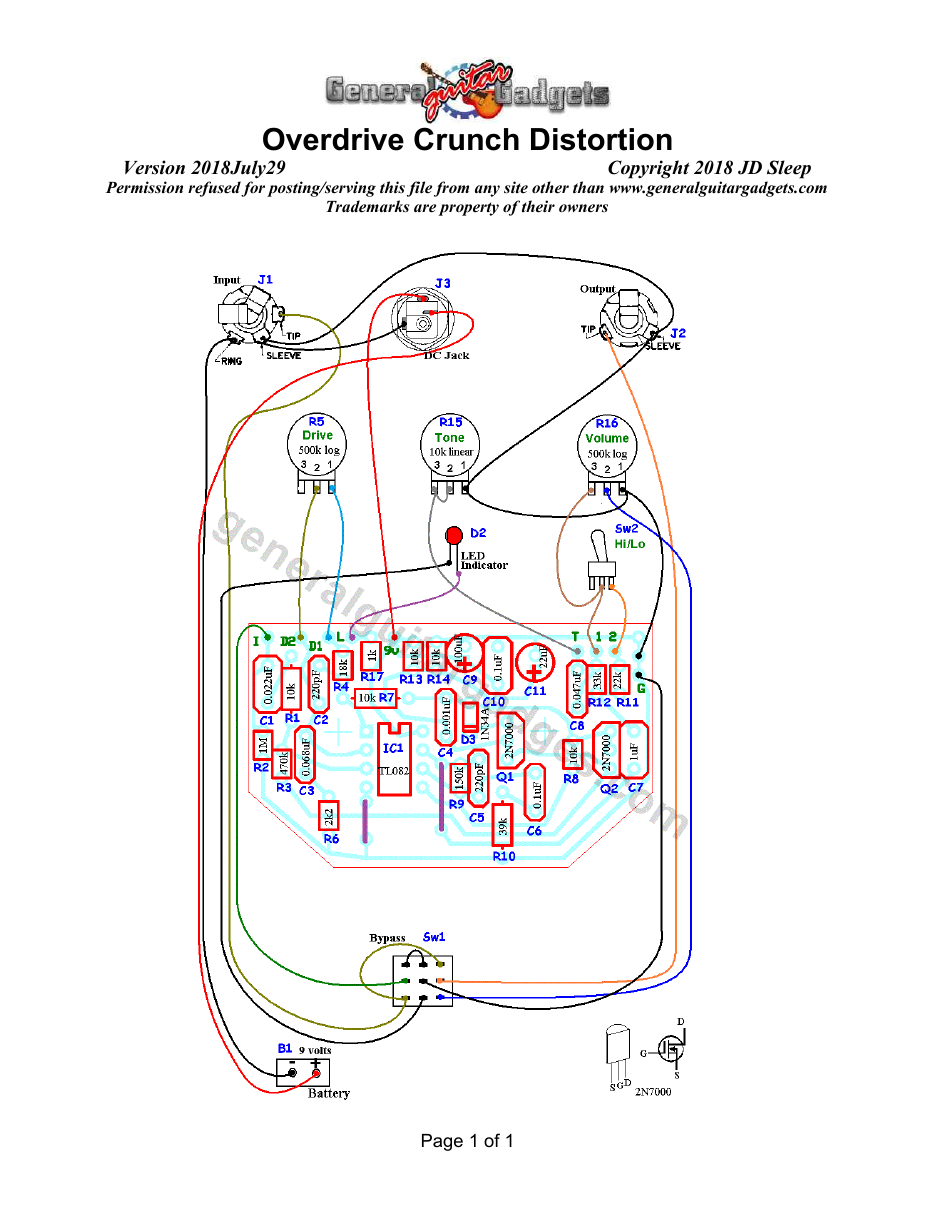
What you will need
Bill of Materials
Version 2018July29 · Copyright 2018 JD Sleep · Permission refused for posting/serving this file from any site other than www.generalguitargadgets.com · Trademarks are property of their owners
Resistors
| Resistor ID | Value | 3-band Marking | 4-band Marking |
|---|---|---|---|
| R1 | 10k | brown-black-orange | brown-black-black-red |
| R2 | 1M | brown-black-green | brown-black-black-yellow |
| R3 | 470k | yellow-violet-yellow | yellow-violet-black-orange |
| R4 | 18k | brown-gray-orange | brown-gray-black-red |
| R5 (Drive) | 1M Linear Potentiometer | ||
| R6 | 2k2 (2.2k) | red-red-red | red-red-black-brown |
| R7 | 10k | brown-black-orange | brown-black-black-red |
| R8 | 10k | brown-black-orange | brown-black-black-red |
| R9 | 150k | brown-green-yellow | brown-green-black-orange |
| R10 | 39k | orange-white-orange | orange-white-black-red |
| R11 | 22k | red-red-orange | red-red-black-red |
| R12 | 33k | orange-orange-orange | orange-orange-black-red |
| R13 | 10k | brown-black-orange | brown-black-black-red |
| R14 | 10k | brown-black-orange | brown-black-black-red |
| R15 (Tone) | 10k Linear Potentiometer | ||
| R16 (Volume) | 500k Log Potentiometer | ||
| R17 | 1k | brown-black-red | brown-black-black-brown |
Capacitors
| Capacitor ID | Value | Type | Possible Marking |
|---|---|---|---|
| C1 | 0.022µF | Film | 223 |
| C2 | 220pF | Ceramic | 221 |
| C3 | 0.068µF | Film | 683 |
| C4 | 0.001µF | Film | 102 |
| C5 | 220pF | Ceramic | 221 |
| C6 | 0.1µF | Film | 104 or µ1 |
| C7 | 1µF | Film or Aluminum Electrolytic | 105 or 1µ |
| C8 | 0.047µF | Film | 473 |
| C9 | 100µF | Aluminum Electrolytic | 100µF |
| C10 | 0.1µF | Film | 104 or µ1 |
| C11 | 22µF | Aluminum Electrolytic | 22µF |
Potentiometers
| Part ID | Value | Type |
|---|---|---|
| R5 - Drive | 500k | Log (Audio) Taper Potentiometer |
| R15 - Tone | 10k | Linear Taper Potentiometer |
| R16 - Volume | 500k | Log (Audio) Taper Potentiometer |
Other
| Part ID | Part Name |
|---|---|
| IC1 | TL082 Opamp |
| Q1 | 2N7000 MOSFET Transistor |
| Q2 | 2N7000 MOSFET Transistor |
| D1 | 1N914 Diode |
| D2 | Status Indicator LED and holder |
| D3 | 1N34A Germanium Diode |
| J1 | Stereo quarter-inch jack |
| J2 | Mono quarter-inch jack |
| J3 | DC Jack |
| B1 | 9 volt battery (not included in the Kit) |
| Sw1 | Heavy Duty 3PDT foot switch 9v battery snap, Printed Circuit Board 24 gauge stranded wire, Enclosure, Knobs |
How to build it
Instructions
Version 2018February13 · Copyright 2018 JD Sleep · Permission refused for posting/serving this file from any site other than www.generalguitargadgets.com · Trademarks are property of their owners
- This is the Overdrive Crunch Distortion kit. The initials may give you an idea of the
- origin of the circuit. This is an excellent distortion box! Use the project documents
- provided, starting with the General Build Instructions. Make sure the polarized
- capacitors are installed correctly according to the layout/wiring diagram.
- Notes:
- There are two jumpers that are built into the top layer of the PCB so you don’t
- need to install them, they are already there.
- The schematic shows a D1 1N914 “Reverse Polarity Protection” diode which is
- not in the layout. You can add this diode to the DC jack if you wish. It is not
- included in the layout because we don’t believe it is of much use against
- preventing damage if you do accidentally give it reverse power.
- If you use an electrolytic polarized cap for C7 the positive is toward the IC and
- negative is towards the output.
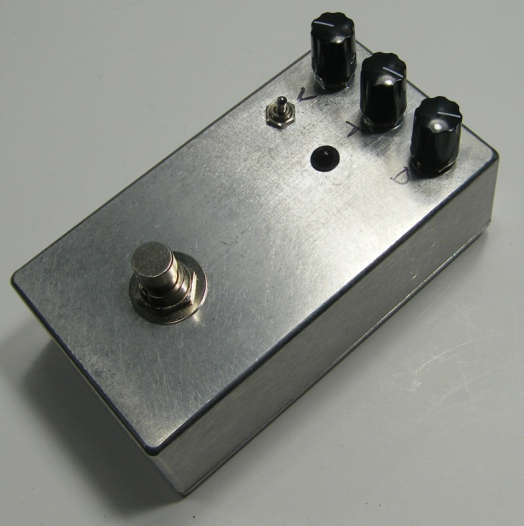
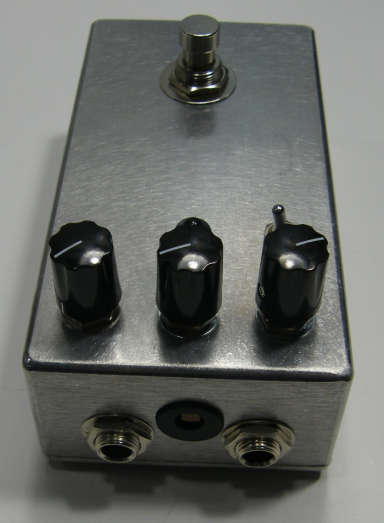
Here's an inside view of the unit we built to give you some general ideas if needed.
Comments and questions are welcome and can be sent to [email protected] Here is a chart of voltages taken at the transistor and IC pins. This information can be used to help find and fix problems if your OC Distortion doesn't work when you test it.
Component
Location
9 volt power supply IC1
Voltage
9.0v
Pin 1
4.5v
Pin 24.5v
4.5v
Pin 3
4.2v
Pin 4
0v



Pin 5
4.5v
Pin 6
4.5v
Pin 7
4.5v
Pin 8
9.0v
More about this project
Notes, sounds and related links

Ready to build? We have the kit.
Buy a OC Distortion Complete Kit. Includes all the parts and materials you need to build one, all for about the price you would pay for a PCB and parts.

Would you like a Ready to Solder Circuit Board for this project?